Climbers preparing for Kilimanjaro usually focus on one number: the summit altitude at 5,895m (19,340 ft). That number matters. But the one that most affects how hard the climb actually feels is total elevation gain — the cumulative vertical ascent across the entire trek, including every up-and-down within each day.
Total gain matters because your legs don’t care about net elevation, they care about how many metres of vertical work they’ve done. A route that gains 4,500m in net elevation might include another 1,000m of intermediate ups and downs, making the real effort closer to 5,500m. The steeper and more rolling the route profile, the harder the trek feels day over day.
This post breaks down elevation gain by route, day by day, so you can see how each itinerary compares and plan your training accordingly.
Key Numbers First
Most Kilimanjaro climbs start at a park gate between 1,800m (5,905 ft) and 2,400m (7,874 ft) depending on the route, and end at Uhuru Peak at 5,895m (19,340 ft). The net gain from the gate to the summit is roughly 3,500m (11,482 ft) to 4,100m (13,451 ft) depending on the route starting elevation.
Total cumulative gain across a full climb (including intermediate ups and downs) typically runs:
| Route | Gate Elevation | Summit Elevation | Net Gain | Total Cumulative Gain (est.) |
|---|---|---|---|---|
| Marangu (5 day) | 1,860m (6,102 ft) | 5,895m (19,340 ft) | 4,035m (13,238 ft) | 4,200–4,400m (13,779-14,435 ft) |
| Marangu (6 day) | 1,860m (6,102 ft) | 5,895m (19,340 ft) | 4,035m (13,238 ft) | 4,400–4,600m (14,435-15,091 ft) |
| Machame (6 day) | 1,800m (6,102 ft) | 5,895m (19,340 ft) | 4,095m (13,238 ft) | 4,800–5,100m (15,748-16,732 ft) |
| Machame (7 day) | 1,800m (6,102 ft) | 5,895m (19,340 ft) | 4,095m (13,238 ft) | 4,900–5,200m (16,076-17,060 ft) |
| Rongai (6 day) | 2,000m (6,561 ft) | 5,895m (19,340 ft) | 3,895m (12,778 ft) | 4,200–4,500m (13,779-14,763 ft) |
| Rongai (7 day) | 2,000m (6,561 ft) | 5,895m (19,340 ft) | 3,895m (12,778 ft) | 4,400–4,700m (14,435-15,419 ft) |
| Shira (7 day) | 3,500m/11,482 ft (4×4 drop-off) | 5,895m (19,340 ft) | 2,395m (7,587 ft) | 3,800–4,100m (12,467-13,451 ft) |
| Lemosho (8 day) | 2,100m (6,889 ft) | 5,895m (19,340 ft) | 3,795m (12,450 ft) | 5,000–5,300m (16,404-17,388 ft) |
| Northern Circuit (9 day) | 2,100m (6,889 ft) | 5,895m (19,340 ft) | 3,795m (12,450 ft) | 5,300–5,600m (17,388-18,372 ft) |
| Umbwe (6 day) | 1,600m (5,249 ft) | 5,895m (19,340 ft) | 4,295m (14,091 ft) | 4,900–5,200m (16,076-17,060 ft) |
These totals include the famous summit-night round trip (from the high camp up to Uhuru and back, then down to the descent camp), plus intermediate climbs like the Barranco Wall and the Lava Tower detour on southern routes.
Note: descent distance is also significant. The total descent on most routes equals or exceeds the total ascent, because you descend further than you climbed on the final day.
Machame Route: Day-by-Day Elevation Gain
The Machame Route is the most popular route on the mountain. Here’s a 7-day itinerary profile:
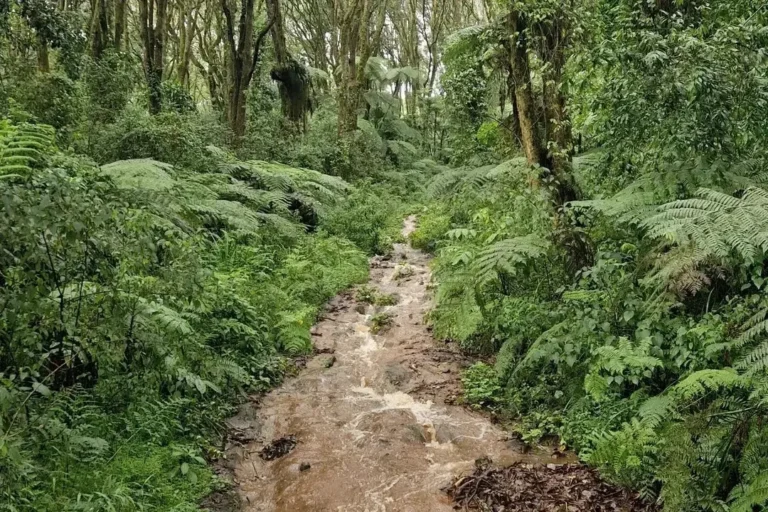
Day 1: Machame Gate (1,800m/5,095 ft) to Machame Camp (3,000m/9,842 ft). Gain: 1,200m/3,937 ft. Terrain: rainforest. Distance: ~11km.
Day 2: Machame Camp (3,000m/9,842 ft) to Shira Camp (3,840m/12,598 ft). Gain: 840m (2,755 ft). Terrain: heather, moorland. Distance: ~5km.
Day 3: Shira Camp (3,840m/12,598 ft) to Lava Tower (4,630m/15,190 ft) to Barranco Camp (3,976m/13,044 ft). Gain up: 790m (2,591 ft). Loss down: 654m (2,145 ft). Net: +136m (446 ft). Total vertical work: 1,444m (4,737 ft). This is the famous “climb high, sleep low” day.
Day 4: Barranco Camp (3,976m/13,044 ft) to Karanga Camp (3,995m/13,106 ft). Gain: minimal net, but includes the Barranco Wall (~300m/984 ft of hands-on scramble) and several valleys. Total vertical work: ~500m (1,640 ft).
Day 5: Karanga Camp (3,995m/13,106 ft) to Barafu Camp (4,673m/15,331 ft). Gain: 678m (2,224 ft). Distance: ~4km. Short day by design — you rest for summit night.
Day 6 (summit day): Barafu (4,673m/15,331 ft) to Uhuru Peak (5,895m/19,340 ft) to Mweka Camp (3,100m/10,170 ft). Gain up: 1,222m/4,009 ft. Loss down: 2,795m (9,169 ft). Total vertical work: 4,017m (13,179 ft). The hardest single day on the mountain.
Day 7: Mweka Camp (3,100m/10,170 ft) to Mweka Gate (1,640m/5,380 ft). Loss: 1,460m (4,790 ft). Pure descent — hard on knees.
7-day Machame total cumulative gain: ~4,900–5,200m/16,076-17,060 ft (including Barranco Wall, Karanga ups and downs).
The 6-day Machame drops Karanga Camp and combines days 4 and 5 into a longer, harder day from Barranco straight to Barafu.
Lemosho Route: Day-by-Day Elevation Gain
The Lemosho Route is the most scenic and highest-success route on the mountain. Here’s a standard 8-day itinerary:
Day 1: Londorossi Gate (2,100m/6,889 ft) to Mti Mkubwa / Big Tree Camp (2,780m/9,120 ft). Gain: 680m (2,230 ft). Rainforest.
Day 2: Mti Mkubwa (2,780m/9,120 ft) to Shira 1 Camp (3,500m/11,482 ft). Gain: 720m (2,362 ft). Moorland.
Day 3: Shira 1 (3,500m/11,482 ft) to Shira 2 Camp (3,900m/12,795 ft). Gain: 400m (1,312 ft). Open plateau.
Day 4: Shira 2 (3,900m/12,795 ft) to Lava Tower (4,630m/15,190 ft) to Barranco (3,976m/13,024 ft). Gain up: 730m (2,395 ft). Loss: 654m (2,145 ft). Total vertical work: 1,384m (4,540 ft). Classic acclimatization day.
Day 5: Barranco (3,976m/ 13,044 ft) to Karanga (3,995m/13,0106 ft). Barranco Wall + intermediate valleys. Total vertical work: ~500m/1,640 ft.
Day 6: Karanga (3,995m/13,106 ft) to Barafu (4,673m/15,331 ft). Gain: 678m/2,224 ft. Rest for summit.
Day 7 (summit day): Barafu (4,673m/15,331 ft) to Uhuru (5,895m/19,340 ft) to Mweka Camp (3,100m/10,170 ft). Total vertical work: ~4,017m/13,179 ft.
Day 8: Mweka Camp (3,100m/10,170 ft) to Mweka Gate (1,640m/5,380 ft). Descent: 1,460m (4,790 ft).
8-day Lemosho total cumulative gain: ~5,000–5,300m (16,404-17,388 ft).
Lemosho has more climbing than Machame despite similar ending elevations, because it starts lower and includes an extra day of approach through the Shira Plateau. The extra days translate into better acclimatization, which is why Lemosho has the highest summit success rate.
Marangu Route: Day-by-Day Elevation Gain
The Marangu Route is the shortest major route and the only one with hut accommodation. A 6-day itinerary:
Day 1: Marangu Gate (1,860m/6,102 ft) to Mandara Hut (2,700m/8,858 ft). Gain: 840m (2,755 ft). Rainforest. ~8km.
Day 2: Mandara Hut (2,700m/8,858 ft) to Horombo Hut (3,720m/12,204 ft). Gain: 1,020m (3,346 ft). Moorland. ~12km.
Day 3 (acclimatization day): Rest at Horombo (3,720m/12,204 ft) with an optional walk to Zebra Rocks (~3,950m/12,959 ft). Extra vertical: ~400m (1,312 ft) round trip.
Day 4: Horombo (3,720m/12,204 ft) to Kibo Hut (4,703m/15,429 ft). Gain: 983m (3,225 ft). Saddle crossing. ~9km.
Day 5 (summit day): Kibo Hut (4,703m/15,429 ft) to Uhuru (5,895m/19,340 ft) to Horombo Hut (3,720m/12,204 ft). Gain up: 1,192m (3910 ft). Loss: 2,175m (7,135 ft). Total vertical work: ~3,367m (11,046 ft).
Day 6: Horombo Hut (3,720m/12,204 ft) to Marangu Gate (1,860m/6,102 ft). Descent: 1,860m (6,102 ft).
6-day Marangu total cumulative gain: ~4,400–4,600m (14,435-15,091 ft).
The 5-day Marangu drops the Horombo acclimatization day. Total vertical is similar but compressed into fewer days — which is why 5-day Marangu has a summit success rate closer to 50%, compared to 70–75% on the 6-day version. We don’t run the 5-day variant at Kilimanjaro Sky; the acclimatization profile is too aggressive.
Rongai Route: Day-by-Day Elevation Gain
The Rongai Route approaches from the north. A 7-day itinerary:
Day 1: Rongai Gate (2,000m) to Simba Camp (2,625m). Gain: 625m.
Day 2: Simba (2,625m) to Second Cave Camp (3,450m). Gain: 825m.
Day 3: Second Cave (3,450m) to Kikelewa Camp (3,600m). Gain: 150m + intermediate climb. Acclimatization-oriented.
Day 4: Kikelewa (3,600m) to Mawenzi Tarn (4,315m). Gain: 715m (2,345 ft).
Day 5 (acclimatization day): Rest at Mawenzi Tarn with optional walk on Mawenzi’s lower slopes.
Day 6: Mawenzi Tarn (4,315m/14,156 ft) to Kibo Hut / School Hut (4,703m / 4,800m; 15,429/15,748 ft). Gain: 388–485m (1,272-1,591 ft). Saddle crossing.
Day 7 (summit day): Kibo Hut (4,703m/15,429 ft) to Uhuru (5,895m/19,340 ft) to Horombo Hut (3,720m/12,204 ft). Total vertical work: ~3,367m (11,046 ft).
Day 8: Horombo (3,720m/12,204 ft) to Marangu Gate (1,860m/6,102 ft). Descent: 1,860m (6,102 ft).
7-day Rongai total cumulative gain: ~4,400–4,700m (14,435-15,419 ft).
Rongai is slightly shorter in total vertical than Machame or Lemosho because it approaches from a higher starting elevation and has a more gradual profile without significant “climb high, sleep low” moves. Trade-off: less intense acclimatization compared to Lemosho.
Northern Circuit: Day-by-Day Elevation Gain
The Northern Circuit is the longest standard route and the best acclimatization profile on the mountain. A 9-day itinerary:
Day 1: Londorossi Gate (2,100m/6,889 ft) to Mti Mkubwa (2,780m/9,120 ft). Gain: 680m (2,230 ft).
Day 2: Mti Mkubwa (2,780m/9,120 ft) to Shira 1 Camp (3,500m/11,482 ft). Gain: 720m (2,362 ft).
Day 3: Shira 1 (3,500m/ 11,482 ft) to Shira 2 Camp (3,900m/12,795 ft). Gain: 400m (1,312 ft).
Day 4: Shira 2 (3,900m/12,795 ft) to Lava Tower (4,630m/15,190 ft) to Moir Camp (4,200m/13,779 ft). Total vertical work: ~900m ()2,952 ft.
Day 5: Moir (4,200m/13,779 ft) to Buffalo Camp (4,020m/13,188 ft). Net loss but includes intermediate climbing over Lent Hills. Total vertical: ~500m (1,640 ft).
Day 6: Buffalo (4,020m/13,188 ft) to Third Cave Camp (3,900m/12,795 ft). Mostly flat to slight descent. Total vertical: ~200m (656 ft).
Day 7: Third Cave (3,900m12,795 ft) to School Hut (4,800m/15,748 ft). Gain: 900m (2,952 ft).
Day 8 (summit day): School Hut (4,800m/15,748 ft) to Uhuru (5,895m/19,340 ft) to Mweka Camp (3,100m10,170 ft). Gain: 1,095m (3,592 ft). Loss: 2,795m (9,169 ft). Total vertical work: ~3,890m (12,762 ft).
Day 9: Mweka Camp to Mweka Gate. Descent: 1,460m (4,790 ft).
9-day Northern Circuit total cumulative gain: ~5,300–5,600m (17,388-181,372 ft).
Northern Circuit has the highest cumulative gain of any route because it includes extra days on the northern flanks of Kibo with significant up-and-down. Those extra days of walking at altitude are exactly what gives this route its best-in-class summit success rate (95–98% at good operators).
What This Means for Your Training
Total cumulative gain gives you a realistic training target. The rough framework:
For 6-day Machame or 5-day Marangu (~4,400m/14,435 ft cumulative gain):
Train to be able to complete a 1,500m (4,921 ft) gain day with a day pack at moderate pace without being destroyed. Build to at least two consecutive days of 1,000m+ (3,280 ft+) gain. Your summit day will ask for 4,000m of vertical work in one push.
For 7-day Machame, 7-day Rongai, or 8-day Lemosho (~4,900–5,200m/16,076-17,060 ft cumulative gain):
Same standard but with more buffer. A week before the climb, you should comfortably hike 1,200m/3,937 ft in a day with 4kg day pack, and be able to back it up the next morning.
For 9-day Northern Circuit (~5,500m/18,044 ft cumulative gain):
The extra days mean daily gain is gentler, but the total is higher. You need endurance more than raw daily capacity. A multi-day backpacking trip with 800–1,000m (2,624-3,280 ft) daily gain across 5+ consecutive days is the best training simulation.
Our general fitness benchmark for Kilimanjaro is the ability to run 10km in under 1 hour, three times a week. That’s the cardiovascular base. On top of that, 4–6 months of hill walking with a weighted pack is the leg-specific training that pays off most.
More training guidance is in our how hard is it to climb Kilimanjaro and how fit do you need to be to climb Kilimanjaro posts.
Why Summit Day Vertical Is the Real Challenge
Notice the pattern across every route: summit day is the dominant single-day vertical effort. On Machame, Lemosho, and Northern Circuit, summit day includes roughly 4,000m of cumulative vertical work (1,200m/3,937 ft ascent + 2,800m/9,186 ft descent). On Marangu and Rongai, it’s about 3,400m (11,154 ft). These are extraordinary single-day totals — on any mountain, at any altitude.
The difficulty is compounded by:
- Altitude (49% of sea-level oxygen at the top)
- Cold (-10°C to -20°C on summit, -5°C to -10°C for most of the descent)
- Duration (12 to 16 hours continuous)
- Sleep quality the night before (1–3 hours of broken sleep is typical)
- Nutrition (appetite is usually gone; climbers eat less than they need)
This is why acclimatization matters so much. A well-acclimatized body on summit day handles 4,000m of vertical work. A poorly-acclimatized body cannot. No amount of general fitness substitutes for acclimatization.
Training for Kilimanjaro is not primarily about being able to do the vertical — most reasonably fit people can. It’s about being able to do the vertical at 5,500m on minimal sleep with reduced oxygen and no appetite. That’s why route choice (longer itinerary = more acclimatization = higher success) matters more than fitness at the margin.
How to Decide
If total cumulative gain is your deciding factor:
- Least cumulative gain: Shira Route (starts at 3,500m/11,482 ft by vehicle). Not necessarily easier — high starting elevation means less acclimatization.
- Moderate cumulative gain, shorter itinerary: Marangu 6-day, Rongai 6-day. Trade-off: shorter but less acclimatization.
- Moderate-high gain, good acclimatization: Machame 7-day, Lemosho 8-day. The most popular balance.
- Highest gain, best acclimatization: Northern Circuit 9-day. For climbers who want the best summit odds and have the time.
Our routes overview compares all seven routes side-by-side. The Machame, Lemosho, and Northern Circuit pages include full elevation profiles. If you’d like help picking the right itinerary for your fitness and experience, get in touch — we’ll give you a straight read on what’s realistic.